

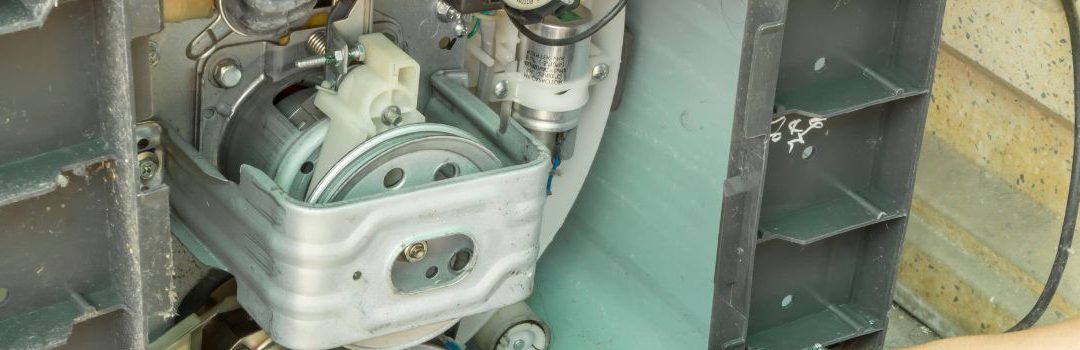
DIY Guide to Replacing Washing Machine Motors in Langley
Replacing a washing machine motor is a practical way to extend the life of your appliance without the expense of a full replacement. The motor is a critical component that drives the drum to wash and spin clothes effectively. When it fails, the washing machine may stop working or operate inefficiently.
Choosing to replace the motor yourself in Langley offers several benefits. It can save you money on labor costs and give you a better understanding of your appliance. Additionally, local access to parts and resources in Langley makes DIY and energy-efficient repairs more accessible.
Before starting the replacement, safety is paramount. Always unplug the washing machine to avoid electrical hazards. Use appropriate tools such as screwdrivers, pliers, and a multimeter for testing electrical components. Wearing safety gloves and eye protection is also recommended to prevent injuries during the repair process.
Understanding Washing Machine Motors
Functionality and Importance
The motor is a crucial component in a washing machine, responsible for powering the drum’s movement during wash and spin cycles. It controls the speed and direction of the drum, ensuring clothes are cleaned effectively. Without a functioning motor, the washing machine cannot operate its cycles properly, making motor maintenance and replacement vital for machine longevity.
Types of Washing Machine Motors
There are three main types of motors used in washing machines:
- Universal Motors: These motors can operate on both AC and DC power. They tend to be lightweight and high-speed, commonly found in older or less expensive models. Universal motors use brushes and commutators, which wear out over time.
- Induction Motors: Typically found in newer washing machines, induction motors are durable and quieter. They work on the principle of electromagnetic induction and usually require a capacitor to start.
- Brushless Motors: Also known as brushless DC motors, these are more efficient and have a longer lifespan because they lack brushes. They are controlled electronically and offer precise speed control.
Understanding these motor types is important because each requires different techniques for replacement and repair, and compatibility varies depending on the washing machine model.
Motor Components and Wiring Basics
A washing machine motor consists of several key components:
- Stator: The stationary part that generates a magnetic field.
- Rotor: The rotating part connected to the drum.
- Brushes and Commutator (in universal motors): Facilitate current flow.
- Windings: Coils of wire that create magnetic fields.
Wiring configurations typically involve color-coded wires that connect the motor to the washing machine’s control board. Common wire colors include red, blue, black, and white, each serving specific functions such as power supply, ground, or speed control.
Speed control mechanisms vary by motor type. Universal motors adjust speed through voltage variation, while induction and brushless motors often use electronic controllers or capacitors to regulate drum speed.
A basic understanding of these components and wiring is essential for safely and effectively replacing or repairing washing machine motors.
Diagnosing Motor Problems
When replacing washing machine motors in Langley, accurately diagnosing motor problems is essential to ensure an effective repair. Here are some common motor issues and troubleshooting techniques to help you identify the root cause.
Common Motor Issues
- Motor Not Starting: This is a frequent problem where the motor fails to initiate spinning. It could be due to electrical faults, a faulty start capacitor, or issues with the motor windings.
- Unusual Noises: Grinding, buzzing, or humming noises during operation often indicate mechanical problems like worn bearings or electrical issues such as short circuits within the motor.
- Overheating: A motor that overheats may shut down prematurely or emit a burning smell. This can result from overloading, poor ventilation, or internal winding damage.
- Motor Running but Drum Not Turning: If the motor runs but the drum doesn’t turn, the problem might lie with the coupling, belt, or clutch rather than the motor itself.
Troubleshooting Techniques
- Using Multimeters and Diagnostic Tools: Begin by testing the motor’s electrical continuity and resistance with a multimeter. This helps identify open or short circuits in the motor windings.
- Identifying Wiring Faults and Motor Winding Damage: Inspect wiring for frayed or broken connections. Damaged windings inside the motor can cause malfunction and require motor replacement.
- Checking Capacitor and Relay Issues: The start capacitor provides the motor with the initial boost to start spinning. Test the capacitor for proper capacitance and replace it if faulty. Similarly, check the relay that controls power to the motor for any signs of failure.
Careful diagnosis using these techniques can save time and prevent unnecessary replacement of parts when fixing washing machine motors.
Step-by-Step Guide to Replacing Washing Machine Motors
Preparation
Before starting the replacement process, gather all necessary tools and the correct replacement motor for your washing machine model. Common tools include screwdrivers, pliers, a socket wrench set, and possibly a multimeter for electrical testing. Ensure the washing machine is unplugged from the power source to avoid any risk of electrical shock. Safety first: wear gloves and keep the work area dry.
Removing the Old Motor
Begin by accessing the motor compartment, usually located at the bottom or back of the washing machine. Remove any panels or covers that block access. Next, detach the belts connected to the motor by loosening the tension and sliding them off carefully. Disconnect all wiring connectors attached to the motor, noting or labeling their positions for easier reinstallation. Finally, remove the motor mounting bolts with the appropriate tools, and carefully take out the old motor.
Installing the New Motor
Place the new motor into the compartment, aligning it properly with the mounting points. Secure it by tightening the mounting bolts firmly but avoid over-tightening to prevent damage. Reconnect the wiring harnesses exactly as they were on the old motor, ensuring each connection is secure. Reinstall the belts onto the motor pulleys and adjust the tension to the manufacturer’s specifications to ensure smooth operation.
Testing the Replacement
After installation, plug the washing machine back in and run a test cycle. Observe the motor’s performance closely, listening for any unusual noises or vibrations. Make sure the machine operates smoothly throughout the cycle. If you notice any issues, double-check the belt tension and wiring connections to correct them before regular use.
Advanced DIY Applications and Repurposing
Repurposing Motors for Other DIY Projects
Washing machine motors can be creatively repurposed for various DIY projects beyond their original use. One popular application is building a small lathe for woodworking. By reusing a washing machine motor, you can create an affordable and effective lathe suitable for shaping and sanding wood.
Another exciting use is converting an old washing machine motor into a DIY generator. This project allows you to generate free power by rewiring the motor, providing an eco-friendly and educational way to understand electricity generation.
Educational DIY Projects
For those interested in educational purposes, constructing a simple washing machine model using a DC motor and battery is an excellent hands-on learning project. This model demonstrates the basic working principles of washing machines and electric motors, making it ideal for STEM education.
Safety and Maintenance Tips
Ensuring Electrical Safety
When replacing washing machine motors, electrical safety is paramount. Always ensure the motor and washing machine are properly grounded to prevent electrical shocks. Use insulated tools and wear rubber-soled shoes when working with electrical components. Pay special attention when handling capacitors and other high voltage parts, as they can retain a dangerous charge even after the machine is unplugged. Discharge capacitors safely before touching them to avoid any risk of shock.
Motor Maintenance Practices
To keep your washing machine motor running smoothly, regular maintenance is essential. Clean the motor and surrounding areas to remove dust and debris that can cause overheating. Lubricate moving parts according to the manufacturer’s recommendations to reduce friction and wear. Routinely inspect the motor for signs of wear and tear such as worn brushes or damaged bearings, and replace parts as needed to extend the motor’s lifespan and ensure efficient operation.
Resources and Further Learning
For those looking to deepen their understanding and skills in replacing washing machine motors, there are valuable resources available:
- A comprehensive washing machine motor basics course that covers functionality, repair techniques, wiring, and troubleshooting. This course is ideal for beginners and anyone wanting to build a solid foundation.
- An interactive DIY washing machine repair manual, which provides step-by-step guidance through the repair process. This resource is helpful for hands-on learners who prefer practical instructions.
These tools can significantly aid in performing a successful washing machine motor replacement with confidence.
Conclusion
Replacing a washing machine motor yourself in Langley can be both cost-effective and rewarding. By taking on this DIY project, you save money on professional repairs and gain a better understanding of how your appliance works. With the right tools and careful attention to instructions, motor replacement is a feasible task for many homeowners.
Beyond repair, old washing machine motors offer exciting opportunities for repurposing. Whether you’re interested in small engineering projects or creative uses around the home, exploring motor reuse can be a fun and sustainable way to give new life to parts that might otherwise be discarded.
Always prioritize safety when working with electrical components. Disconnect power before starting, use appropriate safety gear, and follow all manufacturer guidelines closely. With patience and care, your motor replacement project can be successful and satisfying.

LET’S CONNECT
OPEN HOURS
Mon-Fri: 8AM-6PM
Saturday: 10AM-6PM
Sunday: 10AM-6PM
QUICK LINKS:
LET’S CONNECT
(778) 600-1787
service@langleyappliancesrepair.ca
OPEN HOURS
Mon-Fri: 8AM-6PM
Saturday: 10AM-6PM
Sunday: 10AM-6PM
QUICK LINKS:
© 2025 Langley Appliances Repair All Rights Reserved | Privacy Policy | Sitemap