

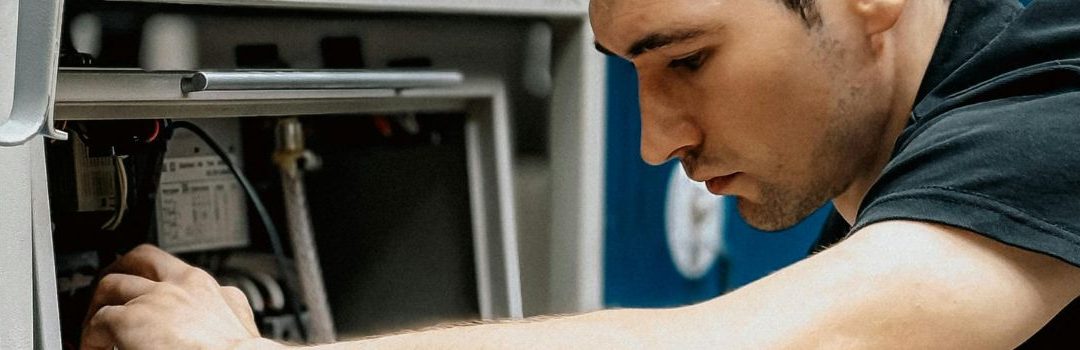
Your Ultimate Guide to Whirlpool Dishwasher Repair in Langley
Maintaining and repairing your Whirlpool dishwasher is essential to ensure it operates efficiently and lasts for years. Regular upkeep helps prevent breakdowns and keeps your dishes clean and sanitized. Whirlpool dishwashers are known for their reliability, but like any appliance, they can experience common issues such as drainage problems, failure to start, unusual noises, and poor cleaning performance.
Understanding these common problems can help you diagnose and fix minor issues quickly. Opting for DIY repair and parts replacement has several benefits, including saving money on service fees and gaining a better understanding of your appliance. However, DIY repairs also allow you to address problems promptly without waiting for professional appointments, minimizing downtime. While some repairs or parts replacement may require professional expertise, many Whirlpool dishwasher issues can be resolved effectively with step-by-step guidance.
Understanding Whirlpool Dishwashers
Overview of Whirlpool Dishwasher Models
Whirlpool dishwashers are known for their reliability and user-friendly features. Most models share common components such as adjustable racks, multiple wash cycles, and energy-efficient technology. Key parts include stainless steel tubs, soil sensors, and quiet motors designed to enhance cleaning performance.
To ensure accurate repairs, it’s important to identify your specific model and serial number. This information is usually located on the inside edge of the dishwasher door or on the frame around the door. Having the correct model number helps in sourcing the right parts and service instructions tailored to your Whirlpool dishwasher.
How a Whirlpool Dishwasher Works
A Whirlpool dishwasher operates through a sequence of steps designed to clean dishes effectively:
- Pre-Wash: The dishwasher sprays water to rinse off loose food particles.
- Main Wash: Water is heated and mixed with detergent; the motor powers the spray arms to distribute water throughout the tub.
- Rinse Cycles: Multiple rinses remove detergent residues.
- Drying: The heating element warms the air inside to dry dishes.
Key components involved in this process include:
- Motor: Powers the pump and spray arms to circulate water.
- Pump: Moves water through the spray arms, ensuring thorough cleaning.
- Spray Arms: Rotate and spray water to cover all dishes.
- Heating Element: Heats water during the wash and aids in drying.
- Control Panel: Allows users to select cycles and controls the dishwasher’s operations.
Understanding these components and their functions is crucial when troubleshooting or repairing your Whirlpool dishwasher.
Preparing for Dishwasher Repair
Safety Precautions
Before starting any repair on your Whirlpool dishwasher, it’s crucial to prioritize safety. Begin by disconnecting the power supply to avoid any risk of electric shock. Unplug the dishwasher from the outlet or switch off the circuit breaker that controls it. Next, turn off the water supply to prevent leaks or flooding during the repair process. Additionally, wear protective gear such as gloves and safety goggles to protect yourself from sharp edges, debris, or cleaning chemicals.
Tools and Materials Needed
Having the right tools and materials on hand will make your dishwasher repair more efficient. Common tools required include a screwdriver set (both Phillips and flathead), pliers, a multimeter for electrical testing, and a putty knife. You may also need replacement parts specific to your Whirlpool model.
Accessing Official Documentation
For accurate and detailed repair guidance, consult the official Whirlpool Dishwasher Repair Manual for model W10131216. This manual provides comprehensive instructions and diagrams to assist you through each step of the repair process. Additionally, the Whirlpool Troubleshooting Guide is a valuable resource for diagnosing common dishwasher issues. Using these official documents ensures you follow the manufacturer’s recommended procedures and maintain your dishwasher’s warranty.
Diagnosing Common Whirlpool Dishwasher Problems
Dishwasher Not Starting
If your Whirlpool dishwasher won’t start, the first steps involve checking the power supply and the door latch. Ensure the dishwasher is properly plugged in and that the circuit breaker hasn’t tripped. The door latch must be securely closed because the dishwasher won’t start if it detects the door is open. Next, inspect the control panel and user interface for any signs of damage or malfunction. Sometimes, buttons may be unresponsive or the display may not light up due to electrical issues.
Poor Cleaning Performance
When dishes come out dirty, start by cleaning the spray arms and filters. Spray arms can get clogged with food particles or mineral deposits, preventing proper water flow. Filters can also accumulate debris that reduces cleaning efficiency. Additionally, verify that the water temperature is hot enough, ideally around 120°F (49°C), for effective cleaning. Lastly, ensure you are using the correct type and amount of detergent, as improper detergent use can affect cleaning results.
Water Not Draining
If water remains at the bottom of the dishwasher after a cycle, inspect the drain pump and hoses. Debris or food particles can block the drain pump impeller or clog the hoses, preventing water from draining properly. Clearing any blockages in these areas usually resolves the issue. Also, make sure the drain hose is not kinked or bent, which can restrict water flow.
Dishwasher Leaking Water
Water leaks often stem from worn or damaged door seals and gaskets. Examine these components for cracks or gaps that could allow water to escape. Another common cause is a faulty water inlet valve, which controls how much water enters the dishwasher. If the valve is defective, it may let in too much water, causing leaks.
Unusual Noises
Unusual noises during operation can indicate worn motor bearings or debris caught in the pump. Listen carefully to identify grinding, squealing, or rattling sounds. If these noises persist, it may be necessary to inspect and replace the motor bearings or clean out any debris obstructing the pump to restore quiet operation.
Step-by-Step Repair Procedures
Repairing the Door Latch
Tools required: Screwdriver, pliers, replacement door latch.
- Unplug the dishwasher to ensure safety.
- Open the dishwasher door and locate the screws securing the inner door panel.
- Use a screwdriver to remove the screws and carefully lift off the panel.
- Identify the door latch mechanism and disconnect any wiring connectors.
- Use pliers or a screwdriver to remove the latch from its position.
- Install the new door latch by securing it in place and reconnecting any wiring.
- Reattach the inner door panel and screw it back securely.
- Test the door latch by closing the door and ensuring it locks properly.
Cleaning or Replacing Spray Arms
Removing spray arms safely:
- Open the dishwasher and locate the spray arms inside.
- Most spray arms can be removed by either unscrewing a central nut or pulling them gently upwards.
- Carefully remove the spray arms without damaging any clips or seals.
Cleaning tips:
- Rinse the spray arms under warm water.
- Use a toothpick or small brush to clear any clogged holes.
- Soak the spray arms in vinegar for 30 minutes to dissolve mineral buildup.
- Rinse thoroughly and reinstall.
Replacement steps:
- Purchase the correct replacement spray arm for your Whirlpool model.
- Remove the old spray arm as described.
- Attach the new spray arm securely in place.
- Ensure it spins freely before closing the dishwasher.
Fixing Drainage Issues
How to access and clean the drain pump:
- Unplug the dishwasher.
- Remove the lower front panel or kick plate to access the drain pump.
- Locate the drain pump and disconnect the wiring harness.
- Remove the hoses connected to the pump, catching any residual water.
- Inspect the pump and its filter for debris or blockages.
- Clean out any obstructions and flush with water.
- Reassemble the hoses and wiring.
Replacing faulty drain pump:
- Follow the steps above to access the drain pump.
- Remove the screws or clips holding the pump in place.
- Take out the faulty pump.
- Install the new pump securely.
- Reconnect hoses and wiring.
- Reattach the front panel.
- Test the dishwasher drainage by running a short cycle.
Replacing Heating Element
Identifying faulty heating elements:
- If the dishwasher is not drying dishes properly or water is not heating, the heating element may be faulty.
- Visually inspect for any breaks or burn marks.
- Use a multimeter to check for continuity.
Safe removal and installation:
- Unplug the dishwasher.
- Access the heating element from inside the dishwasher tub or from underneath, depending on the model.
- Disconnect the wires attached to the heating element.
- Remove any mounting nuts or clips holding the element.
- Carefully pull out the old heating element.
- Insert the new heating element and secure it with mounting hardware.
- Reconnect the wiring.
- Reassemble any panels removed.
- Test the dishwasher heating function.
Control Panel and Electrical Repairs
Diagnosing electrical faults:
- Check for unresponsive buttons or failure to start.
- Inspect wiring and connections for damage or corrosion.
- Use a multimeter to test switches and control board components.
Replacing the control board or switches:
- Unplug the dishwasher.
- Remove the screws securing the control panel.
- Carefully disconnect wiring harnesses.
- Remove the faulty control board or switch.
- Install the replacement part.
- Reconnect wiring and secure the control panel.
- Test the dishwasher to confirm the repair.
Utilizing Online Repair Guides and Resources
When repairing your Whirlpool dishwasher in Langley, taking advantage of online repair guides and resources can make the process much smoother. These resources provide detailed, step-by-step instructions, visual aids, and troubleshooting tips to help you diagnose and fix common problems.
One highly recommended resource is HomeGearGeek’s comprehensive Whirlpool dishwasher repair guide. It offers clear, step-by-step instructions that cover a wide range of issues you might encounter.
For those who prefer visual learning, Sears PartsDirect provides repair videos and detailed guides that demonstrate the repair process. These videos can be very helpful in understanding the practical aspects of each repair step.
Repair Clinic is another excellent source offering instructional videos and articles specifically tailored to Whirlpool dishwashers. Their content covers troubleshooting techniques and repair procedures, making it easier to identify problems and carry out repairs confidently.
Additionally, the Whirlpool Dishwasher Complete Repair Video Guide on YouTube provides a thorough walkthrough of various repair tasks. Watching this video can give you a clearer idea of what to expect and how to perform each step correctly.
Utilizing these online guides and resources will equip you with the knowledge and confidence needed to successfully repair your Whirlpool dishwasher.
Maintenance Tips to Prevent Future Dishwasher Issues
Proper maintenance is key to keeping your Whirlpool dishwasher running smoothly and avoiding costly repairs. Here are some essential tips to help prevent future problems:
- Regular Cleaning of Filters and Spray Arms: Food particles and debris can accumulate in the filters and spray arms, reducing cleaning efficiency and causing blockages. Clean these components regularly by removing them and rinsing under warm water to ensure optimal water flow.
- Using Recommended Detergents and Rinse Aids: Always use detergents and rinse aids that are specifically recommended for Whirlpool dishwashers. Using inappropriate products can lead to residue buildup, poor cleaning results, and even damage to internal parts.
- Running Cleaning Cycles Monthly: Running a cleaning cycle with a dishwasher cleaner once a month helps remove grease, limescale, and mineral deposits from the interior. This keeps the dishwasher fresh and maintains its performance over time.
- Inspecting Door Seals and Hoses Periodically: Check the door seals for cracks or wear, as damaged seals can cause leaks. Inspect hoses for any signs of kinks, cracks, or blockages, and replace them if necessary to prevent water damage and maintain proper water flow.
By following these maintenance practices, you can significantly extend the life of your Whirlpool dishwasher and reduce the likelihood of future repair needs.
Conclusion
Proper diagnosis is crucial when repairing Whirlpool dishwashers, as it ensures that you address the root cause of the problem rather than just the symptoms. Following a step-by-step repair process helps maintain safety and effectiveness, reducing the risk of further damage to your appliance.
Using official Whirlpool manuals and trusted online resources can provide accurate instructions and troubleshooting tips tailored specifically to your model. These resources are invaluable for guiding you through complex repairs with confidence.
However, if you encounter issues beyond your skill level or if the repair involves electrical components or intricate parts, it is important to seek professional help. Qualified technicians can ensure your dishwasher is repaired safely and correctly, saving you time and potential costs in the long run.

LET’S CONNECT
OPEN HOURS
Mon-Fri: 8AM-6PM
Saturday: 10AM-6PM
Sunday: 10AM-6PM
QUICK LINKS:
LET’S CONNECT
(778) 600-1787
service@langleyappliancesrepair.ca
OPEN HOURS
Mon-Fri: 8AM-6PM
Saturday: 10AM-6PM
Sunday: 10AM-6PM
QUICK LINKS:
© 2025 Langley Appliances Repair All Rights Reserved | Privacy Policy | Sitemap