
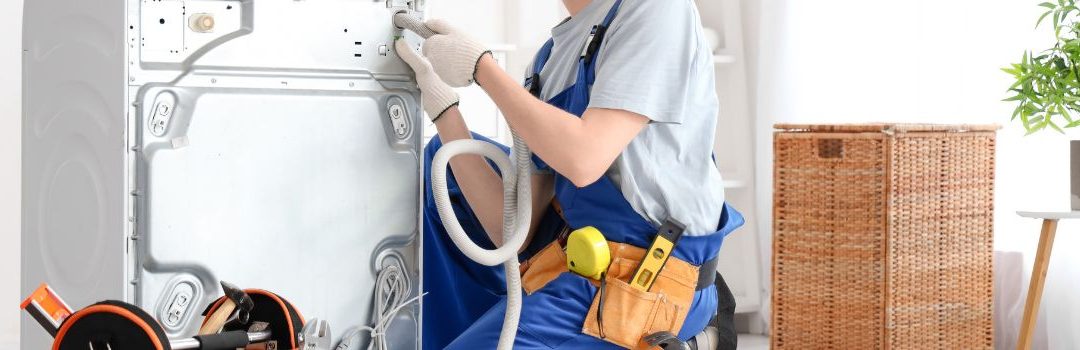
Installing a washer correctly is crucial to ensure its optimal performance and durability. Proper water hookups and drainage setups play a significant role in how well your washer functions and how long it lasts. When these connections are done right, they prevent leaks, water damage, and operational problems.
On the other hand, improper installation can lead to several common issues such as water leaks, poor drainage, and even damage to the appliance itself. These problems can cause inconvenience, costly repairs, and reduce the washer’s lifespan. Understanding the basics of washer water hookups and drainage setup is essential for a hassle-free laundry experience and effective washer maintenance.
Understanding Washer Water Hookups
Types of Water Connections
Washers typically require both hot and cold water supply lines to function properly. These lines deliver water to the machine at the appropriate temperature settings. It’s important to use the correct hose types to ensure compatibility and durability. Most washers use flexible braided stainless steel hoses, which are preferred for their strength and resistance to bursting. Rubber hoses are less durable and more prone to leaks and should be replaced regularly if in use.
Water Supply Requirements
Proper water pressure is essential for washer operation, with most machines requiring a pressure range between 20 and 120 psi. Insufficient pressure can lead to poor washing performance, while excessive pressure may damage hoses and fittings.
Shutoff valves should be installed on both hot and cold water lines near the washer hookup. These valves allow you to quickly stop the water supply in case of leaks or maintenance. Positioning the shutoff valves within easy reach behind or beside the washer is recommended.
Using the correct fittings and connectors is crucial to prevent leaks. Standard washer hookups use 3/4-inch garden hose thread fittings, so ensure that your hoses and valves are compatible with this size. Avoid using adapters that can compromise the connection quality.
Installation Best Practices
Before installation, inspect water hoses for any signs of damage, wear, or cracks. Replace any hoses that appear compromised to prevent leaks.
When connecting the hoses, ensure they are securely tightened but avoid overtightening, which can damage the fittings. Applying plumber’s tape on threaded connections can help create a leak-proof seal.
Avoid kinks and sharp bends in the water supply hoses, as these can restrict water flow and increase the risk of hose failure. Arrange hoses in a gentle curve and keep them away from heat sources or abrasive surfaces to extend their lifespan.
Drainage Setup for Washers
Drainage System Basics
Proper drainage is essential for the efficient operation of your washer. Without an effective drainage system, water can back up, cause leaks, or even damage your machine. There are several common types of drainage setups used for washers:
- Standpipe: A vertical pipe connected to the home’s drain line where the washer’s drain hose is inserted. This is the most common setup.
- Laundry Tub: A utility sink where the washer can drain directly. This allows for easy monitoring and cleaning.
- Floor Drain: A drain installed in the floor, often found in basements or laundry rooms, where the washer hose can discharge.
Choosing the right drainage setup depends on your laundry room layout and plumbing.
Drain Hose Installation
Correct installation of the drain hose is crucial to prevent leaks and odors. The hose should be securely fastened to the standpipe, laundry tub, or floor drain to prevent it from coming loose during the washer’s drain cycle.
It’s important to maintain an adequate air gap between the end of the drain hose and the top of the drain pipe or tub. This gap prevents wastewater from siphoning back into the washer, which can cause contamination or mechanical issues.
Additionally, a P-trap or similar trap should be installed in the drainage line to block sewer gases from entering your laundry area. Ensuring these elements are properly set up helps maintain a hygienic and effective drainage system.
Preventing Drainage Issues
To avoid clogs and backups, avoid washing items that shed excessive lint or debris without using a lint trap or filter. Regularly inspect and clean the drain hose and standpipe to remove buildup.
Perform routine maintenance by checking for kinks or damage in the drain hose and ensuring connections remain tight. If you notice slow drainage or water backing up, address the issue promptly to prevent water damage or washer malfunction.
Proper upkeep and correct installation are key to maintaining a trouble-free washer drainage system.
Location and Space Considerations
Choosing the Right Location
When setting up your washer water hookups and drainage, choosing the right location is crucial. The washer should be close to existing water supply and drainage points to minimize plumbing work and reduce installation costs. Additionally, the area should have adequate ventilation to prevent moisture buildup and must allow sufficient clearance around the washer for safety and operational efficiency. Proper ventilation also helps prevent mold and mildew, which can develop in damp, enclosed spaces (Concord Pacific’s Washer Installation Guide).
Installation Clearances
Maintaining the appropriate space around your washer is essential for both maintenance and operation. Manufacturers typically recommend a minimum clearance of several inches on all sides to ensure the washer can be easily moved or serviced without obstruction. This space also helps prevent vibration and noise during use. Ensuring these clearances are met will contribute to the longevity and efficiency of your washer setup.
Electrical Setup and Safety
When setting up your washer’s electrical connection, it’s essential to understand the power requirements to ensure safe and efficient operation. Most standard washers require a dedicated 120-volt, 15- or 20-amp circuit. This dedicated circuit prevents overloads and minimizes the risk of electrical issues.
Proper grounding is critical for safety. Your washer should be connected to a grounded outlet to avoid electrical shocks. The outlet should be a three-prong or, preferably, a GFCI (Ground Fault Circuit Interrupter) type, especially in laundry areas where moisture is present.
Outlet placement should be convenient yet safe. Typically, the outlet is installed about 42 to 48 inches above the floor behind the washer. This height protects the outlet from potential water exposure and makes it easily accessible for plugging and unplugging.
During installation, always follow safety precautions. Ensure the power is turned off at the breaker before working with electrical connections. Avoid using extension cords or adapters, as they can cause overheating or electrical fires. Keep the washer’s power cord away from water sources and sharp edges. If unsure about electrical work, consult a licensed electrician.
For detailed guidance, refer to Home Depot’s Washer Installation and User Manual. This resource provides step-by-step instructions and safety tips to help you complete the electrical setup correctly.
Professional Installation vs. DIY
Benefits of Professional Installation
Having a professional handle your washer water hookups and drainage setup ensures that everything is connected correctly and safely. Experts are trained to install appliances according to local codes and manufacturer specifications, which helps prevent leaks and water damage. Proper installation also reduces the risk of appliance breakdowns, which can be costly and inconvenient. As highlighted by Sardis Appliance Repair, professional installation can prevent up to 80% of first-year breakdowns, saving homeowners from potential headaches and expensive repairs (Sardis Appliance Repair’s Article).
Common Mistakes in DIY Installations
When attempting a DIY washer hookup, common errors often lead to problems. One frequent mistake is improper water connections, which can cause leaks and water damage. Another is incorrect placement of the drain hose, which may result in water backups and drainage issues. These errors can not only damage your home but also shorten the lifespan of your washing machine.
Cost Considerations
The cost of professional washer installation varies, but on average, it typically ranges from $150 to $300. This usually covers the hookup of water supply lines, proper drainage setup, and ensuring the appliance is level and functioning correctly. While DIY installation might save you money upfront, the potential risks and costs associated with mistakes often make professional installation the more economical choice in the long run (HomeAdvisor’s Washer and Dryer Installation Cost Guide).
Ensuring Appliance Longevity
Impact of Proper Installation
Proper installation of your washer water hookups and drainage system plays a critical role in reducing the risk of breakdowns and costly repairs. When set up correctly, the washer operates more efficiently, which not only saves energy and water but also extends the overall lifespan of the appliance. Ensuring that hoses are connected securely and drainage is properly aligned prevents unnecessary strain on the machine’s components.
Maintenance Tips
To maintain your washer in optimal condition, regularly inspect the water hoses and drainage connections for signs of wear, cracks, or leaks. Early detection of potential issues allows for prompt repairs, preventing water damage and machine malfunctions. Clogs in the drainage system can lead to standing water and odors, so clear any blockages as soon as they are noticed.
Repair Statistics and Implications
It is important to emphasize the value of getting the initial installation and repairs done correctly. According to Consumer Reports’ Washer Repair Rates, nearly 40% of washing machine repairs are not fixed properly the first time. This statistic highlights how improper repairs or faulty setups can lead to recurring problems, increased repair costs, and reduced appliance longevity. Investing time and care in proper installation and maintenance ultimately ensures your washer works reliably for years.
Troubleshooting Common Installation Issues
Identifying and Fixing Leaks
Leaks are one of the most frequent problems encountered during washer water hookup installation. To identify a leak, inspect all connections, including the water supply hoses and the drain hose, for any signs of moisture or drips. Tighten any loose fittings carefully, but avoid over-tightening as this can damage the washers or threads. If a hose is cracked or damaged, replace it immediately. Additionally, check the rubber washers inside the hose connectors; worn or missing washers often cause leaks and should be replaced.
Resolving Drainage Problems
Drainage issues can cause water to back up or drain slowly, leading to potential flooding or machine malfunctions. First, ensure the drain hose is properly positioned and not kinked or clogged. The hose should be elevated according to manufacturer guidelines to prevent backflow. If drainage is still slow, inspect the drain trap and pipes for blockages. Clearing any obstructions or using a drain snake can restore normal flow. In some cases, improper venting can cause drainage issues, so verify that the plumbing vent is functioning correctly.
Dealing with Water Supply Interruptions
Water supply interruptions can halt washer operation and may be caused by valve problems, supply line issues, or municipal water disruptions. Start by confirming that the water supply valves are fully open. If the valves are open but no water flows, check the supply hoses for kinks or damage. Sediment buildup in the inlet screens of the washer can also block water flow; cleaning these screens regularly helps maintain supply. If local water service is interrupted, contacting the water utility is necessary to determine the duration of the outage.
Conclusion
Proper washer water hookups and drainage setup are essential to ensure the efficient and safe operation of your washing machine. Key points to remember include selecting the correct water supply lines, ensuring secure connections to prevent leaks, and installing a reliable drainage system that complies with local plumbing codes. Paying attention to these details helps avoid water damage and maintains optimal washer performance.
Professional installation is highly recommended to guarantee that all components are correctly installed and functioning safely. Licensed plumbers have the expertise to identify potential issues and ensure that your washer’s water hookups and drainage meet all required standards.
To maintain your washer’s health and performance over time, regularly inspect hoses for signs of wear or damage, clean the drain filter to prevent clogs, and avoid overloading the machine. These simple maintenance steps can extend the life of your washer and prevent costly repairs.
Following these guidelines will help you achieve a reliable and efficient washer setup that serves your household needs effectively.

LET’S CONNECT
OPEN HOURS
Mon-Fri: 8AM-6PM
Saturday: 10AM-6PM
Sunday: 10AM-6PM
QUICK LINKS:
LET’S CONNECT
(778) 600-1787
service@langleyappliancesrepair.ca
OPEN HOURS
Mon-Fri: 8AM-6PM
Saturday: 10AM-6PM
Sunday: 10AM-6PM
QUICK LINKS:
© 2025 Langley Appliances Repair All Rights Reserved | Privacy Policy | Sitemap