
Maintaining a gas oven is crucial for both safety and efficiency in any household. Regular upkeep helps prevent common safety hazards such as gas leaks and fires, while also ensuring your oven operates at its best, saving energy and extending its lifespan.
Common repair needs for gas ovens often include fixing igniters, thermostats, burners, and door seals. Many of these issues can be addressed with basic tools and a well-stocked DIY gas oven repair kit, allowing homeowners to save time and money by handling minor repairs themselves.
Professional gas oven repairs can be costly, with average expenses ranging from $200 to $500 depending on the issue. By learning some essential repair skills and having the right tools, Langley homeowners can effectively manage these repairs without the need for immediate professional assistance.
Understanding Your Gas Oven
How Gas Ovens Work
A gas oven operates through the coordinated function of several key components: the igniter, thermostat, gas valve, and burner. The igniter is responsible for lighting the gas; when the oven is turned on, it heats up and ignites the gas released by the gas valve. The thermostat regulates the oven’s temperature by signaling the gas valve to open or close, maintaining the desired heat level. The burner distributes the flame evenly inside the oven chamber, allowing food to bake or broil properly. Together, these parts ensure efficient and controlled cooking.
Common Issues in Gas Ovens
Several common problems can disrupt the normal operation of a gas oven:
- Igniter failure: This is the most frequent issue, accounting for about 27% of all gas oven repairs. When the igniter fails, the gas does not ignite, and the oven will not heat properly or at all.
- Thermostat malfunctions: If the thermostat is faulty, it can cause inaccurate temperature readings, leading to uneven cooking or failure to reach the set temperature.
- Gas valve problems: A malfunctioning gas valve may prevent gas from flowing correctly, resulting in a lack of heat or unsafe gas leaks.
- Burner blockages and dirt accumulation: Over time, burners can become clogged with food debris or grease, which can disrupt the flame pattern and reduce heating efficiency.
Understanding these components and common issues can help Langley homeowners diagnose problems more effectively when using a DIY gas oven repair kit.
Assessing When to DIY vs. Call a Professional
Pros and Cons of DIY Repairs
DIY gas oven repairs offer several advantages, primarily cost savings. Typical repair costs range from $150 to $400, which is significantly less than the $600 to $1,600 price tag for a full replacement. Additionally, tackling repairs yourself provides an opportunity to gain valuable knowledge and skills about your oven’s mechanics, which can be empowering and useful for future maintenance.
However, there are risks involved. Improper repairs can lead to serious safety hazards, especially when dealing with gas appliances. Mistakes might cause gas leaks, fire risks, or electrical problems, which can endanger your home and family.
Safety First: Important Precautions
Gas and Carbon Monoxide Risks
When working with gas ovens, safety must be the top priority due to the dangers associated with gas leaks and carbon monoxide exposure. Never use your gas oven to heat your home, as this can lead to carbon monoxide poisoning, a serious and potentially fatal risk. Proper ventilation is essential when operating or repairing a gas oven to ensure harmful gases do not accumulate indoors. Installing a carbon monoxide detector near your kitchen can provide early warning of dangerous gas buildup, helping to keep you and your family safe.
Electrical Safety
Before beginning any repairs on a gas oven, always turn off both the power supply and the gas supply to prevent electrical shocks or gas leaks. Using the right tools, such as continuity testers, helps verify that circuits are safely de-energized before you start working. This step is critical to avoid accidents and ensure that you can perform repairs confidently and securely.
Essential Tools and Components for Your DIY Gas Oven Repair Kit
Tools
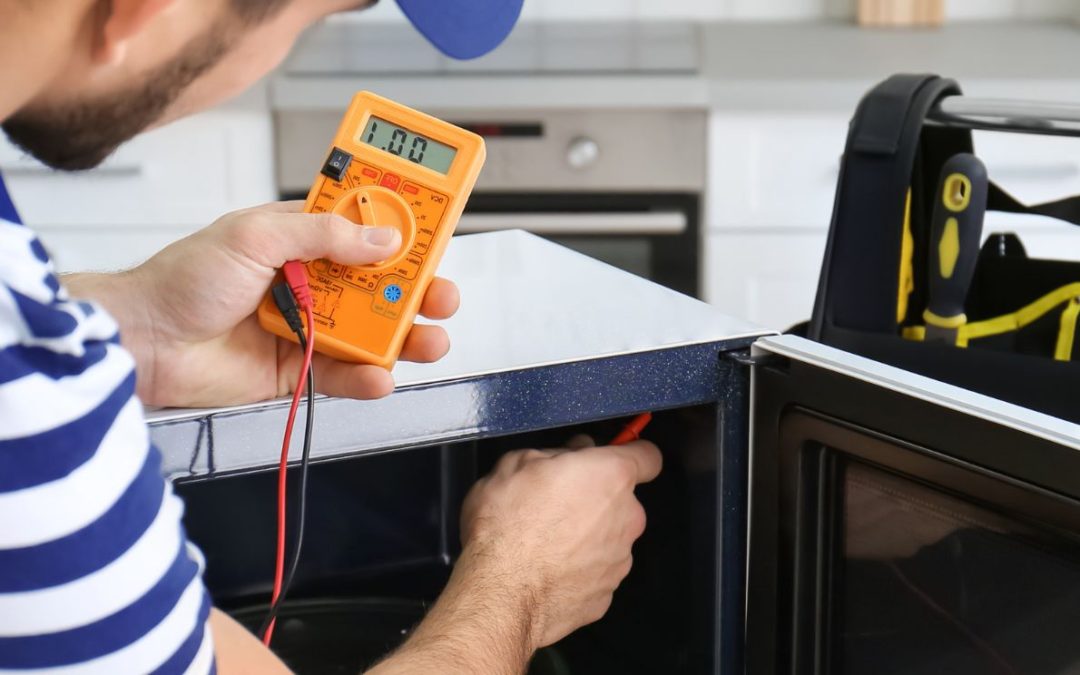
To effectively carry out gas oven repairs, having the right tools is crucial. A continuity tester is essential for safely checking electrical circuits, helping to diagnose issues without risk. You should also include a set of screwdrivers, both flathead and Phillips, to handle various screws found in ovens. Nut drivers and wrenches are necessary for loosening and tightening nuts and bolts. A multimeter is another vital tool for measuring electrical values like voltage, current, and resistance. Additionally, a flashlight or headlamp will improve visibility inside the oven, especially in dimly lit areas. Always wear work gloves and safety glasses to protect yourself during repairs.
Replacement Parts
Having key replacement parts on hand is equally important for successful DIY gas oven repairs. These parts include the oven igniter, which is responsible for lighting the gas burner. The thermostat controls the oven temperature and may need replacement if the oven is not heating properly. The gas valve regulates gas flow to the burner, and a faulty valve can prevent the oven from igniting. The burner assembly itself can wear out or become clogged and may require replacement. Lastly, the oven door gasket ensures a proper seal to maintain heat within the oven; a damaged gasket can lead to heat loss and inefficient cooking.
Equipping your repair kit with these tools and parts will prepare you to handle most common gas oven issues safely and effectively.
Step-by-Step Guide to Common DIY Repairs
Replacing an Oven Igniter
One common issue with gas ovens is igniter failure, which can be identified if the oven does not heat up or if the igniter glows but the gas doesn’t ignite. Another sign is if the oven takes longer than usual to start heating. To replace the igniter, you will need a screwdriver, a socket wrench, and a replacement igniter specific to your oven model.
Steps:
- Turn off the gas supply and unplug the oven.
- Remove the oven racks and the bottom panel inside the oven.
- Locate the igniter, usually near the burner.
- Unscrew and disconnect the igniter from the electrical connectors.
- Install the new igniter by connecting it to the electrical connectors and securing it with screws.
- Replace the bottom panel and racks.
- Turn the gas and power back on, then test the oven to ensure the igniter works properly.
Cleaning and Maintaining Burners
Blocked burners can cause uneven heating or prevent the oven from igniting. To maintain burners, you should regularly clean them to remove food debris and grease.
Removing Blockages:
- Turn off the gas and unplug the oven.
- Remove the burner grates and caps.
- Use a soft brush or a toothpick to clear any debris from the burner holes.
Proper Cleaning Techniques:
- Soak burner caps and grates in warm, soapy water.
- Use a non-abrasive scrubber to clean the surfaces.
- Avoid using harsh chemicals that can damage the burner components.
- Dry all parts thoroughly before reassembling to prevent rust or damage.
Thermostat Replacement and Calibration
If your oven is not maintaining the correct temperature, it may be due to thermostat issues. Signs include inaccurate oven temperature or the oven cycling on and off too frequently.
Steps for Replacement and Testing:
- Turn off the oven and disconnect power.
- Locate the thermostat, often behind the control panel.
- Remove the control knobs and the panel to access the thermostat wiring.
- Disconnect the wires, noting their positions for reconnection.
- Remove the faulty thermostat and replace it with the new one.
- Reconnect the wiring and reassemble the control panel and knobs.
- Plug the oven back in and test the temperature with an oven thermometer.
- If necessary, calibrate the thermostat following the manufacturer’s instructions to ensure accurate temperature control.
Maintenance Tips to Prevent Future Repairs
Regular Cleaning
Keeping your gas oven clean is essential to ensure it operates efficiently and safely. Clean the oven interior and burners regularly ideally once a month to prevent buildup of grease and food debris. Use a non-abrasive cleaner and a soft cloth or sponge for the oven interior. For burners, remove them carefully and soak in warm, soapy water, then use a soft brush to clear any clogged ports. Avoid using harsh chemicals that could damage components.
Routine Safety Checks
Performing routine safety checks can help you detect issues before they become serious problems. Regularly inspect the oven and its connections for any gas leaks. You can do this by applying a soapy water solution to the gas line and connections—if bubbles appear, you may have a leak that needs immediate attention. Additionally, test all electrical components, such as igniters and controls, to ensure they function properly. Replace any faulty parts promptly to maintain safe operation.
Proper Usage Practices
To prevent unnecessary damage, use your gas oven according to the manufacturer’s guidelines. Avoid slamming the oven door, overloading racks, or placing heavy pots directly on the oven floor. Also, refrain from using the oven to heat your home or dry clothes, as these practices can cause wear or hazards. Following proper usage practices will extend the lifespan of your oven and reduce the need for repairs.
Cost Considerations and Budgeting
When deciding between repairing your gas oven or replacing it entirely, it’s important to evaluate the costs involved carefully. Generally, if the repair costs approach or exceed 50% to 70% of the price of a new oven, replacement may be the more economical choice. This threshold helps avoid sinking too much money into an appliance that might soon require additional repairs or become less efficient over time. Considering the age and condition of your oven alongside repair estimates can guide you in making the right decision for your budget and long-term needs.
Opting for a DIY gas oven repair kit can offer significant savings compared to hiring a professional. However, it’s essential to factor in the costs beyond just the kit itself. Acquiring the right tools may require an upfront investment if you don’t already own them, which can add to your overall expense. Additionally, not all repairs go as planned; if a DIY attempt fails or uncovers more complex issues, you might need to call a professional technician, potentially increasing your costs further. Being aware of these hidden expenses can help you budget more accurately and decide whether a DIY approach is truly cost-effective for your situation.
Resources for Langley Homeowners
Local Suppliers and Parts Stores
For Langley homeowners looking to repair their gas ovens, finding quality replacement parts and tools locally can save time and ensure compatibility. Some trusted suppliers in the area include Langley Appliance Parts, which offers a wide range of OEM oven components, and Home Hardware Langley, known for basic repair tools and accessories. These stores provide knowledgeable staff who can assist in selecting the right parts for your specific oven model.
Professional Repair Services
When facing complex gas oven repairs beyond DIY capabilities, it’s important to rely on experienced professionals. Langley is home to several reputable repair technicians, such as Langley Appliance Repair Experts and Precision Oven Services. These companies specialize in gas oven maintenance and repairs, ensuring safety and efficiency. Hiring certified technicians can prevent further damage and guarantee that repairs meet safety standards.
Online Tutorials and Support Communities
For additional guidance during your DIY gas oven repair, online resources can be invaluable. Websites like RepairClinic.com and AppliancePartsPros.com offer detailed repair guides and videos specific to many gas oven models. Additionally, forums such as the Appliance Repair subreddit and the Langley Homeowners Facebook group provide community support where you can ask questions and share experiences with fellow DIYers. These platforms make troubleshooting more accessible and help build confidence in completing repairs safely.
Conclusion
Having a well-equipped DIY gas oven repair kit is crucial for Langley homeowners who want to address common oven issues promptly and effectively. A comprehensive kit not only saves time but also reduces the costs associated with professional repairs, which can vary significantly depending on the problem.. Essential tools tailored for appliance repairs help ensure that most minor issues can be tackled without delay.
However, while DIY repairs are empowering, it is important to balance enthusiasm with caution. Gas ovens involve potential hazards such as gas leaks or carbon monoxide exposure, making safety a top priority. Homeowners should know when to seek professional help, especially for complex or risky repairs, to avoid accidents and ensure proper functioning.
In summary, a well-prepared repair kit combined with an understanding of safety measures can make DIY oven repairs both cost-effective and secure. By being prepared and cautious, Langley homeowners can maintain their gas ovens efficiently while protecting their homes and families.

LET’S CONNECT
OPEN HOURS
Mon-Fri: 8AM-6PM
Saturday: 10AM-6PM
Sunday: 10AM-6PM
QUICK LINKS:
LET’S CONNECT
(778) 600-1787
service@langleyappliancesrepair.ca
OPEN HOURS
Mon-Fri: 8AM-6PM
Saturday: 10AM-6PM
Sunday: 10AM-6PM
QUICK LINKS:
© 2025 Langley Appliances Repair All Rights Reserved | Privacy Policy | Sitemap