
DIY Repair Tips for Washing Machine Leaks in Langley Homes
Addressing washing machine leaks promptly is crucial to prevent water damage, avoid costly repairs, and maintain the appliance’s efficiency. Ignoring leaks can lead to mold growth, structural damage, and increased utility bills. Many households also need help with washer installation across Langley, which can play a role in preventing leaks from happening in the first place.
DIY repairs offer several benefits, including significant cost savings by avoiding professional service fees, the convenience of fixing issues on your own schedule, and quick solutions that minimize downtime for your washing machine.
Common causes of leaks in washing machines include worn or damaged hoses, faulty door seals, clogged or broken pumps, and issues with the water inlet valve. Understanding these typical problems can help you identify and fix leaks effectively.
Understanding Your Washing Machine
Types of Washing Machines
Washing machines generally come in two main types: top-loading and front-loading. Top-loading machines have a lid on the top and the drum is accessed from above. They typically fill with water from the top, agitate the clothes, and then drain the water. Front-loading machines have a door on the front and use a horizontal drum that rotates to clean the clothes.
Both types share common components that can be related to leaks. These include hoses that carry water in and out, valves that control water flow, seals that prevent water from escaping, and the drum itself where clothes are washed. Understanding these components is key to diagnosing and fixing leaks.
How Washing Machines Work
At a basic level, washing machines fill with water through inlet hoses connected to your home’s water supply. Valves open to allow water in, and the drum rotates to agitate the clothes. After washing, the water drains through a drainage hose out of the machine.
Hoses are flexible tubes that bring water into the machine and take dirty water out. Valves regulate the flow of water, opening when the machine needs to fill and closing when it doesn’t. Seals are rubber or plastic parts that prevent water from leaking at connection points, such as where the door or hoses attach.
Leaks often occur when hoses crack or become loose, valves malfunction, or seals wear out. Knowing the role of each part helps in identifying the cause of a leak and performing the necessary repairs.
Common Causes of Washing Machine Leaks
Leaks in washing machines can stem from various issues, many of which are easily identifiable and fixable with some basic DIY skills. Understanding the common causes can help you diagnose and repair leaks effectively.
- Damaged or worn supply hoses: Supply hoses connect your washing machine to the water source. Over time, these hoses can become brittle, cracked, or loose, leading to leaks. Regularly inspecting and replacing old hoses can prevent water damage.
- Faulty water inlet valves: The water inlet valve controls the flow of water into the machine. If this valve malfunctions or becomes blocked, it can cause leaking or flooding. Signs include water dripping from the back of the machine or continuous filling.
- Clogged or dirty inlet screens: Located inside the water inlet valve, the inlet screens filter debris from the water supply. When these screens get clogged, water flow is restricted, which can cause leaks or improper filling.
- Leaking door seals or gaskets (especially in front-loaders): Front-loading machines use rubber door seals to prevent water from escaping during cycles. Over time, these seals can degrade, tear, or accumulate dirt, resulting in leaks around the door.
- Drain pump or hose issues: The drain pump removes water from the machine during and after cycles. If the pump or drain hose is damaged, blocked, or loose, water may leak onto the floor.
- Overloading or improper detergent use: Overloading the washer or using excessive or inappropriate detergents can cause excessive suds or strain the machine. This can lead to water spilling out or leaks developing around seals and hoses.
By checking these common areas, you can often pinpoint the source of a leak and take steps to fix it before it causes further damage.
Tools and Safety Precautions for DIY Repairs
When tackling a leaking washing machine repair yourself, having the right tools and following safety precautions are crucial for a smooth and safe process.
Essential Tools
- Wrench: Useful for loosening or tightening nuts and bolts on hoses and fittings.
- Screwdriver: Needed to remove panels or screws securing components.
- Pliers: Helpful for gripping and twisting parts, especially clamps on hoses.
- Towels: Keep towels handy to soak up any water spills during the repair.
- Bucket: Use a bucket to catch any water that drains when disconnecting hoses.
Safety Tips
- Unplug the Machine: Always disconnect the washing machine from the power outlet before starting any repair to avoid electrical shock.
- Turn Off Water Supply: Shut off the water valves to prevent water flow and further leaking.
- Proper Handling: Handle parts carefully to avoid damage and wear protective gloves if necessary to protect your hands.
By preparing with these tools and following safety steps, you can minimize risks and effectively address leaks in your washing machine.
Step-by-Step Troubleshooting and Repair Guide
1. Inspecting and Repairing Supply Hoses
Start by examining the supply hoses for any signs of damage such as cracks, bulges, or general wear. These issues can cause leaks and should be addressed immediately. If you find old or damaged hoses, replace them with braided stainless steel auto-shutoff connector hoses. These not only last longer but also prevent flooding by automatically shutting off water flow in case of a leak. When reconnecting hoses, ensure the connections are properly tightened to avoid leaks but avoid overtightening, which can damage the threads.
2. Checking and Cleaning Water Inlet Valve and Screens
Test the water flow through the inlet valve by running the washing machine and observing if water enters smoothly. If water flow is restricted, disconnect the inlet valve and inspect the screens for debris or buildup. Carefully clean these screens to restore proper water flow. Signs that the inlet valve might be faulty include irregular water filling or water leaking around the valve area. In such cases, replacement is necessary to stop leaks and ensure efficient operation.
3. Examining and Replacing Door Seals and Gaskets
For front-loading machines, leaks often originate from worn or damaged door seals and gaskets. Inspect these seals closely for tears, cracks, or areas where dirt has accumulated. Clean the seals thoroughly to remove any debris that might compromise their seal. If you find any damage such as worn or torn sections, replace the gaskets promptly to prevent water from leaking during wash cycles.
4. Inspecting and Repairing Drain Pump and Drain Hoses
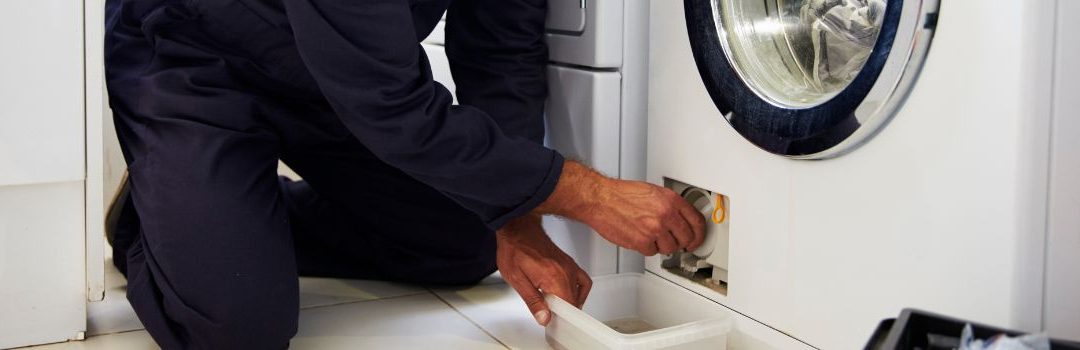
Leaks near the base of the washing machine can stem from the drain pump or drain hoses. Look for wet spots or pooling water around these parts. To address this, check for clogs in the drain pump and hoses, cleaning them out if necessary. If you notice cracks or damage, replace the faulty parts to restore proper drainage and prevent leaks.
5. Additional Small Repairs and Maintenance Tips
Regularly tighten any loose fittings and clamps to maintain a secure water-tight system. Also, inspect the washer tub for any cracks that could cause leaks. Routine maintenance, including these checks, is crucial to preventing leaks and extending the life of your washing machine.
Preventative Measures to Avoid Future Leaks
Regular maintenance is key to preventing leaks in your washing machine. Start by routinely inspecting hoses and connections for any signs of wear, cracks, or loose fittings. Catching these early can prevent water from escaping during cycles.
When replacing parts, always opt for high-quality components. Using reliable replacement parts ensures better durability and fit, reducing the risk of leaks caused by faulty or incompatible pieces.
Avoid overloading your washer as this puts extra stress on hoses and seals, increasing the chance of leaks. Additionally, use the correct type and amount of detergent to prevent excessive suds, which can cause pressure buildup and lead to leaks.
Finally, consider installing flood prevention devices. These systems can detect leaks early and shut off water supply, providing an extra layer of protection for your home and washing machine.
Finding Reliable Washing Machine Repair Services in Langley
When choosing a repair service, look for local companies with good reviews and verified credentials. Reliable technicians in Langley will offer transparent pricing, warranties on their work, and prompt service. Checking online platforms, asking for recommendations, and confirming licensing ensure you hire a trustworthy professional to fix your leaking washing machine effectively and safely.
Conclusion
Timely DIY repair for leaking washing machines is crucial to prevent water damage, reduce repair costs, and avoid further complications. Addressing leaks as soon as they appear helps maintain the efficiency and longevity of your appliance.
Following step-by-step guides carefully ensures that repairs are done correctly and safely. Taking the time to understand each stage of the process can save you from common mistakes and unnecessary expenses.
Regular maintenance plays a key role in extending the lifespan of your washing machine. By keeping components clean, checking hoses and seals, and promptly fixing small issues, you can enjoy a reliable machine for years to come.
This comprehensive guide combines expert tips and step-by-step instructions to empower Langley residents to confidently tackle leaking washing machine repairs on their own.

LET’S CONNECT
OPEN HOURS
Mon-Fri: 8AM-6PM
Saturday: 10AM-6PM
Sunday: 10AM-6PM
QUICK LINKS:
LET’S CONNECT
(778) 600-1787
service@langleyappliancesrepair.ca
OPEN HOURS
Mon-Fri: 8AM-6PM
Saturday: 10AM-6PM
Sunday: 10AM-6PM
QUICK LINKS:
© 2025 Langley Appliances Repair All Rights Reserved | Privacy Policy | Sitemap