
Essential Toolkit for DIY Dishwasher Part Replacement in Langley
Having a comprehensive DIY dishwasher repair toolkit is essential for homeowners in Langley. Dishwashers are a common appliance, but they often face issues like clogged spray arms, faulty door latches, or malfunctioning pumps. These problems can disrupt daily routines and lead to costly professional repairs if not addressed promptly.
In Langley households, common dishwasher issues include water not draining properly, dishes coming out dirty, unusual noises during operation, and leaks. With the right tools and knowledge, many of these problems can be fixed quickly and efficiently at home.
Choosing DIY repairs over professional services offers several benefits. It saves money on labor costs, reduces downtime by allowing immediate action, and gives homeowners a better understanding of their appliance. Additionally, having a well-equipped toolkit ensures that repairs, as well as compact dishwasher installation, can be done safely and correctly, preventing further damage to the dishwasher.
Understanding Your Dishwasher: Key Components and Functions
Major Dishwasher Parts
A dishwasher consists of several critical components that work together to clean your dishes effectively. The control panel and electronic components allow you to select cycles and manage the dishwasher’s operation. Spray arms and water inlet valves control the flow and distribution of water, ensuring all dishes get cleaned thoroughly. Heating elements and pumps are responsible for heating the water to the right temperature and circulating it during the wash cycle. Filters and drainage systems prevent debris from clogging the machine and ensure wastewater is properly drained.
Common Dishwasher Problems and Their Roots
Many dishwasher issues stem from these key components. Leaking and water drainage problems often result from faulty seals, clogged filters, or malfunctioning drainage systems. Poor cleaning performance can be traced back to blocked spray arms, defective water inlet valves, or worn-out pumps. Electrical and control failures usually involve issues with the control panel or electronic components, causing the machine to stop mid-cycle or not start at all. Noisy operation and mechanical faults may be due to damaged spray arms, failing pumps, or worn bearings within the machine.
Diagnostic Approach: Langley’s Complete Dishwasher Parts Checklist
Step-by-Step Diagnostic Procedures
Diagnosing a dishwasher issue starts with identifying the symptoms and linking them to potential faulty parts. For example, if the dishwasher is not draining properly, the problem might lie with the drain pump or clogged filters. Langley provides a detailed checklist that correlates common symptoms such as unusual noises, failure to start, or water leaks with specific parts that typically cause these issues. This targeted approach helps narrow down the repair focus efficiently.
Using diagnostic tools alongside the checklist enhances accuracy. By systematically testing components, you can confirm suspicions before replacement. For instance, testing the heating element with a multimeter can verify if it’s functioning correctly or needs replacement.
Tools Needed for Diagnosis
To perform effective diagnostics on your dishwasher, certain tools are essential:
- Multimeter: For checking electrical continuity and measuring voltage in components like heating elements, thermostats, and switches.
- Screwdrivers and Pliers: Basic hand tools needed to open panels, remove parts, and handle connectors safely.
- Leak Detectors: Devices or methods to find hidden water leaks that might not be visible but cause operational issues.
- Voltage Testers: To safely verify power supply to various parts and ensure no electrical faults exist.
Having these tools on hand allows you to carry out the diagnostic procedures thoroughly and safely, following Langley’s comprehensive checklist.
Essential Tools for Langley DIY Dishwasher Repairs
The Ultimate Toolkit Essentials
When repairing your dishwasher, having the right tools makes all the difference. Here are the essential tools you should have in your Langley DIY dishwasher repair toolkit:
- Screwdriver sets: Include flathead, Phillips, and Torx screwdrivers to handle various screw types commonly found in dishwashers.
- Nut drivers and socket sets: These are crucial for loosening and tightening nuts and bolts.
- Pliers: Needle nose pliers help reach tight spaces, while locking pliers provide a firm grip when needed.
- Multimeter: Essential for electrical testing to diagnose wiring and component issues safely.
- Putty knives and scrapers: Useful for removing old sealants or gaskets.
- Leak detection tools: Help identify water leaks that could cause dishwasher malfunctions.
- Replacement parts storage and labeling system: Keeps your parts organized and easy to find during repairs.
Must-Have Tools from Top Appliance Repair Lists
Some specialty tools designed specifically for dishwasher components can make repairs more efficient and effective. Additionally, maintaining your tools properly and following safety guidelines are critical for both the longevity of your tools and your personal safety during repairs.
By assembling this comprehensive set of tools, you’ll be well-equipped to handle most dishwasher repairs on your own.
Sourcing Quality Replacement Parts in Langley
Where to Find Genuine and Compatible Parts
When replacing dishwasher parts in Langley, it’s important to start with reliable sources to ensure you get genuine and compatible components. Local appliance stores and authorized dealers are often the best places to find authentic parts that match your dishwasher model. These outlets typically carry OEM (Original Equipment Manufacturer) parts, which guarantee compatibility and quality.
In addition to local stores, online marketplaces and specialty suppliers offer a broad selection of dishwasher replacement parts. Websites dedicated to appliance parts can be useful for finding specific items, sometimes at lower prices. However, when purchasing online, it’s crucial to verify the seller’s reputation and ensure the parts are genuine to avoid compatibility issues.
Evaluating Part Quality and Compatibility
Choosing between OEM and aftermarket parts is a key consideration. OEM parts are made by the original manufacturer and are designed to fit and function exactly like the original components. This usually means higher reliability and longer lifespan.
Aftermarket parts, while often cheaper, vary in quality and may not always match the exact specifications of OEM parts. Some aftermarket parts can perform well, but others might lead to premature failure or poor dishwasher performance.
Always check the warranty and return policies before finalizing a purchase. Genuine parts from authorized dealers often come with warranties, offering peace of mind. Return policies are also important, especially when buying online, in case the part is incompatible or defective. Prioritizing quality and compatibility will help ensure your dishwasher replacement project goes smoothly and lasts longer.
Step-by-Step DIY Dishwasher Part Replacement Guide
Preparation and Safety Measures
Before starting any dishwasher repair, ensure the appliance is completely disconnected from the power source. This prevents electrical shock and damage to the unit. Unplug the dishwasher or switch off the circuit breaker supplying power. Next, clear and organize your workspace. Lay down protective coverings such as old towels or cardboard around the dishwasher to protect your floors and surrounding cabinetry from water spills or scratches during the repair.
Common Part Replacements
Water Inlet Valve Replacement
The water inlet valve controls the flow of water into your dishwasher. If the dishwasher does not fill properly, this valve might be faulty. After disconnecting power and water supply, access the valve usually located at the bottom or back of the dishwasher. Remove the old valve by disconnecting the water line and electrical connectors, then install the new valve following the reverse steps.
Spray Arm and Filter Cleaning/Replacement
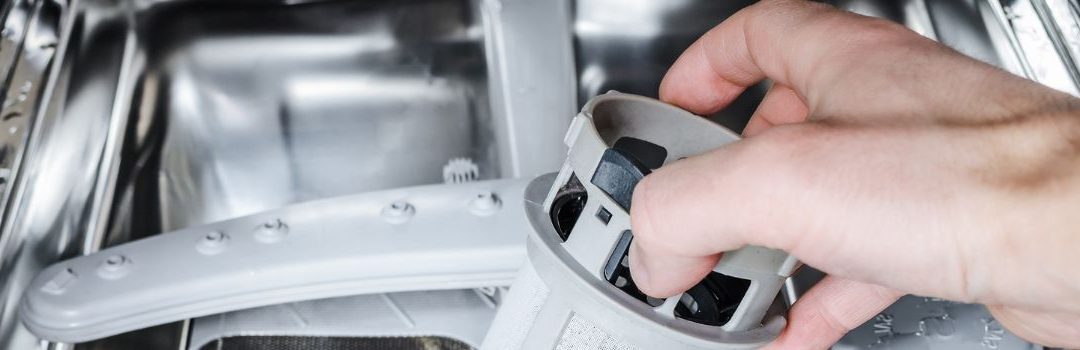
Clogged spray arms or filters reduce cleaning efficiency. Remove the spray arms by unscrewing or unclipping them. Clean any debris or mineral buildup with warm water and a brush. Filters can be cleaned or replaced if damaged. Regular maintenance helps avoid more significant issues.
Heating Element Troubleshooting and Replacement
If dishes are not drying properly, the heating element may be defective. Access the heating element inside the dishwasher tub, usually at the bottom. Test it with a multimeter for continuity. If faulty, disconnect electrical wires and mounting hardware to replace it with a compatible element.
Door Latch and Gasket Repairs
A malfunctioning door latch can prevent the dishwasher from starting. Inspect the latch for damage and replace if necessary by removing screws and electrical connectors. Door gaskets ensure a watertight seal; if leaking occurs, replace worn gaskets by pulling out the old seal and pressing the new one firmly into place.
Troubleshooting Tips During Repair
Watch for signs of incorrect installation such as leaks, unusual noises, or the dishwasher failing to start. Double-check all connections, screws, and seals. After replacing parts, run a short cycle without dishes to test functionality and confirm the repair was successful.
Using Digital Repair Guides for Assistance (etsy.com)
Digital repair guides offer step-by-step printable instructions that simplify the repair process. They can be especially useful for complex parts or unfamiliar procedures. Integrating troubleshooting printables into your workflow helps identify problems quickly and ensures you follow each step correctly, reducing the risk of errors.
When to Call a Professional: Understanding Repair Limits
Indicators You Need Expert Help
While many dishwasher issues can be addressed with a DIY toolkit, certain problems require professional expertise. Complex electrical issues, such as faulty wiring or control board failures, pose safety risks and demand specialized knowledge. Persistent leaks are another red flag; they not only affect dishwasher performance but can also cause significant water damage to your kitchen. Additionally, if your dishwasher is still under warranty, attempting repairs yourself might void it, so consulting a professional is advisable to maintain coverage and ensure safe repairs.
Overview of Professional Repair Services in Langley
Professional repair services in Langley offer a range of options to address dishwasher problems efficiently. Pricing typically varies depending on the complexity of the repair but investing in expert diagnostics can save time and money by accurately pinpointing issues. Professionals bring the benefit of experience and the right tools to fix problems that go beyond basic troubleshooting, ensuring your dishwasher operates safely and effectively. Choosing a reputable service provider in Langley guarantees quality repairs backed by service warranties, providing peace of mind that DIY efforts can’t always match.
Maintaining Your Dishwasher Post-Repair
Routine Care and Maintenance Tips
To keep your dishwasher running smoothly after a repair, regular care is essential. Start by cleaning the filter frequently to prevent food debris buildup that can cause clogs and reduce cleaning efficiency. Additionally, check the spray arms for any blockages or damage, ensuring that water sprays evenly throughout the dishwasher.
Using the correct detergent type and amount is also crucial. Avoid using regular dish soap, which can cause excessive suds and damage. Instead, select detergents designed specifically for dishwashers and follow the manufacturer’s recommendations. Choosing the appropriate wash cycle for your load can conserve energy and reduce wear on the machine.
Extending Appliance Lifespan
Periodic inspections are key to catching small issues before they become major problems. Look for signs of leaks, unusual noises, or parts showing wear. Addressing these early can save costly repairs down the line.
Preventative part replacements, such as changing worn-out seals or hoses before they fail, help maintain optimal performance. Staying proactive with maintenance will extend your dishwasher’s lifespan and ensure it continues to operate efficiently.
Conclusion
A well-prepared toolkit and solid diagnostic strategies are key to successfully repairing your dishwasher. Essential items such as screwdrivers, multimeters, pliers, and replacement parts ensure you’re ready to handle common issues efficiently. Using a step-by-step diagnostic approach helps pinpoint problems accurately, saving time and avoiding unnecessary repairs.
For Langley residents, having confidence in tackling dishwasher repairs not only reduces costs but also extends the life of your appliance. With the right tools and knowledge, many typical dishwasher issues become manageable DIY projects.
By equipping yourself with the right tools and information, you can confidently maintain and repair your dishwasher, ensuring it runs smoothly for years to come.

LET’S CONNECT
OPEN HOURS
Mon-Fri: 8AM-6PM
Saturday: 10AM-6PM
Sunday: 10AM-6PM
QUICK LINKS:
LET’S CONNECT
(778) 600-1787
service@langleyappliancesrepair.ca
OPEN HOURS
Mon-Fri: 8AM-6PM
Saturday: 10AM-6PM
Sunday: 10AM-6PM
QUICK LINKS:
© 2025 Langley Appliances Repair All Rights Reserved | Privacy Policy | Sitemap