

Your Ultimate Guide to Diagnosing Dishwasher Parts in Langley
Dishwashers are essential appliances in many households, helping to save time and effort in cleaning dishes. However, like any machine, they can encounter issues that affect their performance. Regular diagnostics and maintenance are crucial to ensure your dishwasher runs efficiently and to prevent costly repairs.
Langley’s Complete Dishwasher Parts Diagnostic Checklist is designed to guide you through a thorough inspection of your dishwasher’s components. This comprehensive checklist covers all critical parts, including when the spray arm is not spinning becomes a common issue that will help you identify potential problems early and understand the necessary maintenance steps.
By following a systematic inspection and troubleshooting process, you can extend the lifespan of your dishwasher, improve its efficiency, and avoid unexpected breakdowns. This checklist serves as a practical tool for both homeowners and technicians aiming to maintain optimal dishwasher performance.
Understanding Dishwasher Components
Control Panels and Electronic Interfaces
The control panel, often featuring touchpads or buttons, serves as the command center of a dishwasher. It allows users to select wash cycles, start or pause the machine, and monitor progress. These electronic interfaces rely on circuit boards and sensors to execute commands.
Common electronic faults include unresponsive buttons, error codes, or the dishwasher failing to start. Diagnosing these issues typically involves checking for loose connections, damaged wiring, or faulty control boards. Resetting the dishwasher or performing a diagnostic test mode can help pinpoint problems.
Dish Racks and Loading Mechanisms
Dish racks come in various designs standard, adjustable, fold-down tines, and utensil holders that affect how dishes fit and how effectively water reaches all surfaces. Proper loading ensures optimal cleaning performance.
When inspecting dish racks, look for broken or bent tines, rust, and any misalignment that can obstruct spray arms or cause dishes to shift during cycles. Worn rollers or tracks on sliding racks should also be checked to ensure smooth movement.
Spray Arms and Water Distribution Systems
Spray arms distribute water throughout the dishwasher to clean dishes thoroughly. Their movement and water pressure are critical; spray arms must rotate freely without obstruction.
Blockages inside the spray arm holes from food debris or hard water deposits reduce water coverage. Leaks or cracks in spray arms can impair performance. Diagnosing issues involves removing the arms, cleaning the nozzles, and inspecting for damage.
Regular maintenance includes cleaning spray arms and checking seals to maintain optimal spray coverage and washing efficiency.
Drainage and Water Inlet Systems
Drainage components include filters, pumps, and hoses that remove wastewater from the dishwasher. The water inlet system controls the flow of fresh water into the machine.
Check for clogs in filters and hoses that can cause poor drainage or water backup. Inspect pumps for unusual noises or failure to drain properly. The water inlet valve should be tested for proper operation and examined for leaks or mineral buildup that can restrict water flow.
Addressing these issues promptly prevents water damage and ensures reliable dishwasher operation.
Heating Elements and Drying Components
Heating elements heat water during wash cycles and aid in drying dishes afterward. They are crucial for sanitizing and evaporating water.
Signs of heating element failure include dishes remaining wet, wash cycles taking longer, or the dishwasher not heating water. Testing involves using a multimeter to check element continuity.
Drying problems may also stem from faulty fans or blocked vents. Regular inspection and cleaning help maintain these components.
Detergent Dispensers and Rinse Aid Systems
Detergent dispensers release soap at the appropriate cycle phase, while rinse aid systems help prevent spotting and improve drying.
Malfunctions include dispensers not opening, releasing detergent prematurely, or residue buildup. These issues can reduce cleaning effectiveness and leave spots or film on dishes.
Cleaning dispenser compartments and ensuring proper loading of rinse aid prevents these problems and supports optimal dishwasher performance.
Step-by-Step Diagnostic Checklist
Pre-Inspection Preparation
Before starting any diagnostic process on your dishwasher, safety is paramount. Always unplug the appliance from the power source to prevent electrical shock. Additionally, turn off the water supply to avoid leaks or flooding during inspection. Gather the necessary tools and materials, such as a multimeter, screwdrivers, a flashlight, and cleaning cloths, to facilitate a thorough examination.
Visual and Physical Inspection
Begin with a careful visual inspection of the dishwasher. Look for any signs of leaks around the base and door area. Check for corrosion on metal parts and any visible physical damage to the exterior or interior components. Pay close attention to the door seals and latches; worn or damaged seals can cause water leakage, and faulty latches may prevent the door from closing properly.
Functional Testing
Next, run the dishwasher through a diagnostic or standard cycle to observe its operation. Watch the control panel for any error codes or unusual responses, which can provide clues about underlying issues. Listen carefully for any abnormal noises such as grinding, buzzing, or clicking, which may indicate mechanical problems.
Component-Specific Diagnostics
For a more detailed analysis, perform tests on specific components:
- Control Panel: Attempt resetting the control panel and check for displayed error codes. This can often resolve minor electronic glitches.
- Spray Arms: Verify that the spray arms rotate freely without blockage. Remove any debris that might obstruct water flow.
- Drain Pump: Test the drain pump operation and inspect for clogs that could hinder drainage.
- Heating Element: Use a multimeter to measure the resistance of the heating element to ensure it is functioning correctly.
- Water Inlet Valve: Check that the water inlet valve opens and closes properly to regulate water flow.
Common Issues and Their Diagnosis
Several common problems can arise during dishwasher operation, and recognizing their signs is crucial:
- Odor and Cleanliness Problems: Persistent bad smells or dishes not coming out clean often point to drainage issues or buildup inside the dishwasher.
- Drying Failures: If dishes remain wet after a cycle, the heating element or vent may be malfunctioning.
- Water Drainage Delays: Slow or incomplete drainage can be caused by clogged filters, blocked drain pumps, or faulty valves.
- Cycle Interruptions and Electronic Faults: Unexpected stops during cycles often indicate control board errors or wiring problems.
Following this structured checklist will help identify the root causes of most dishwasher issues efficiently.
Maintenance Tips for Longevity and Efficiency
Regular Cleaning Procedures
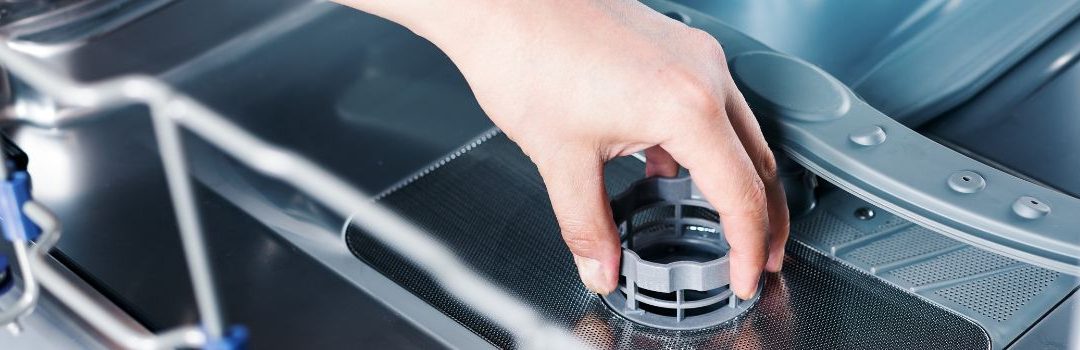
Keeping your dishwasher clean is essential for its optimal performance. Begin with regular filter cleaning and replacement. The filter traps food particles and debris, so it should be checked and rinsed under running water weekly. Replace it if you notice any damage or persistent clogging.
Spray arms and racks also require attention. Remove and rinse spray arms to clear any blockages in the holes that can reduce water flow. Inspect the racks for rust or damage and clean them to prevent residue buildup. Proper maintenance of these parts ensures thorough cleaning and prevents wear.
Preventative Care
Preventative care helps avoid costly repairs and extends your dishwasher’s lifespan. Periodically check hoses and seals for cracks, leaks, or wear. Damaged hoses can cause leaks, while worn seals may lead to water escaping during cycles.
Always use detergents and rinse aids recommended by the manufacturer. Using inappropriate products can cause buildup or damage components. Additionally, avoid overloading or improper loading of dishes. Overloading restricts water circulation and reduces cleaning efficiency, while improper loading can block spray arms or damage racks.
Seasonal and Deep Maintenance
Perform seasonal deep maintenance to keep your dishwasher running smoothly. Full system flushing and descaling remove mineral deposits and buildup inside the machine. Use a dishwasher cleaner or a vinegar solution as advised in your manual.
Electrical components also benefit from inspection and care during deep maintenance. Check wiring connections for signs of wear or corrosion and ensure controls are functioning correctly. Addressing these issues early helps prevent unexpected breakdowns.
Utilizing Manuals and Technical Resources
Manufacturer Manuals and Part Guides
When diagnosing dishwasher issues, consulting model-specific manufacturer manuals is essential. These manuals provide detailed information about the parts, wiring diagrams, and troubleshooting steps unique to each dishwasher model. Using accurate manuals ensures that you identify the correct components and understand their function within the system, reducing the risk of misdiagnosis. Certified Appliance Parts Manuals are a reliable source for accessing these detailed guides, helping you match parts accurately to your dishwasher model.
Technical Training and Service Guides
Advanced troubleshooting often requires deeper technical knowledge beyond basic manuals. Appliance training materials and service guides offer comprehensive instructions, common fault codes, and step-by-step repair techniques. These resources provide insight into complex issues and teach diagnostic strategies that can save time and improve repair accuracy. Chadwell University’s Appliance Troubleshooting Resources offer a variety of training materials tailored for technicians aiming to enhance their diagnostic skills.
Repair Manuals and Diagnostic Tools
Repair manuals are invaluable for detailed part diagnostics and step-by-step repair procedures. They often include exploded diagrams, test procedures, and tips for identifying faulty components. Utilizing these manuals alongside diagnostic tools allows for precise troubleshooting and effective repair planning. The Dishwasher Training/Repair Manual is a comprehensive resource that guides technicians through the diagnostic process and repair techniques for various dishwasher models.
Safety and Environmental Considerations
When diagnosing and repairing dishwasher parts, safety should always be the top priority. Handling electrical components requires caution to avoid shocks or short circuits. Always disconnect the dishwasher from the power source before inspecting or replacing any electrical parts. Additionally, be mindful of water connections; ensure the water supply is turned off to prevent leaks or flooding during the repair process.
Proper disposal of faulty parts is equally important. Many dishwasher components contain materials that should not be thrown away with regular household waste. Parts like circuit boards, motors, and certain plastics need to be disposed of according to local electronic waste regulations to minimize environmental impact.
To promote energy-efficient usage, consider maintaining parts such as filters and spray arms regularly. Clean and well-functioning components help the dishwasher run efficiently, reducing water and electricity consumption. Using dishwasher detergent recommended by manufacturers and running the appliance only with full loads can also contribute to energy savings while ensuring optimal performance.
Conclusion
A thorough diagnostic checklist is essential for accurately identifying and resolving dishwasher issues. By systematically examining each component, you can avoid unnecessary repairs and ensure your dishwasher operates efficiently. Regular maintenance, guided by a comprehensive checklist, not only extends the lifespan of your appliance but also maintains its optimal performance.
To deepen your understanding and keep your dishwasher in top condition, be sure to consult the linked resources. Staying informed and proactive is the best way to prevent problems and enjoy reliable dishwashing for years to come.

LET’S CONNECT
OPEN HOURS
Mon-Fri: 8AM-6PM
Saturday: 10AM-6PM
Sunday: 10AM-6PM
QUICK LINKS:
LET’S CONNECT
(778) 600-1787
service@langleyappliancesrepair.ca
OPEN HOURS
Mon-Fri: 8AM-6PM
Saturday: 10AM-6PM
Sunday: 10AM-6PM
QUICK LINKS:
© 2025 Langley Appliances Repair All Rights Reserved | Privacy Policy | Sitemap